Updated: September 4, 2026
|
8 min read
Updated: September 4, 2026
|
8 min read
NEW: Automated Campaign Optimization for Pop Ads

Every Pop campaign runs across many different sites at once. In the campaign report each of them shows up as a placement, which is just an ID for one place your ad was shown. Some placements send traffic that converts. Some send traffic that never will for specifically your offer.
Sorting one from the other is a big part of a media buyer’s day. You open the report, find the placements that spent money and brought nothing back, exclude them, and repeat it tomorrow.
Pop campaigns on the SmartCPM bidding model now have a toggle that does this for you. It’s called Automated campaign optimization, and it’s new in campaign settings.
Before the setup steps, it helps to see why this job eats so much time when you do it by hand. That’s what the feature is really solving.
Why cutting placements manually is harder than it looks
You’re always one day behind
A bad placement appears in your report in the morning. By then it has already spent yesterday’s budget, and you had no way to see it while it was happening. So every decision you make is based on data that’s a day old.
With one campaign, that’s a small tax you can live with. Run ten campaigns in a few countries and it turns into most of your working day, with the same delay happening on each one separately.
You only ever look at the top of the list
Placement reports are usually sorted by spend. You start at the top, cut the obvious offenders, and stop when the rows start looking too small to matter.
But Pop traffic spreads across a lot of placements. Under the ones you checked there can be hundreds more, each spending a little. Individually none of them is worth your attention. Added up, they’re real money leaving the campaign. The problem here isn’t that you don’t know how to cut them. It’s that no person is going to read three hundred rows every morning.
Your blacklist doesn’t move to new campaigns as well as you’d hope
Most buyers keep a list of bad placements collected over months and apply it to everything they launch. That works only if a bad placement stays bad everywhere, and it doesn’t.
What actually decides performance is the combination: this placement, with this offer, on this landing page. A placement that’s useless for a giveaways offer can do fine for a utility app. A placement that carried your best campaign last quarter can be worthless for the offer you’re running now. So the list you built keeps less value than it feels like it should, and each new campaign starts from scratch again.
What the toggle does about this
Turn it on and the campaign starts using your own conversion data as it comes in. Combinations of placement, country and operating system that don’t convert get pulled back automatically. You stop being the person who opens the report and cuts them by hand.
Three of the problems above get solved by that directly:
- It works from conversions as they arrive, not from your morning routine, so the delay you’re paying for gets shorter.
- It doesn’t lose interest halfway down the report. Small placements get checked the same way the big ones do.
- It judges each placement inside the campaign it’s actually running in, which is the only place where the placement-plus-offer combination is visible.
This is not the same thing as SmartCPM
SmartCPM decides how much to pay for an impression. Automated optimization decides which placements are worth buying from at all. They work on different questions and run at the same time. Turning one on doesn’t replace the other.
You need conversion tracking first
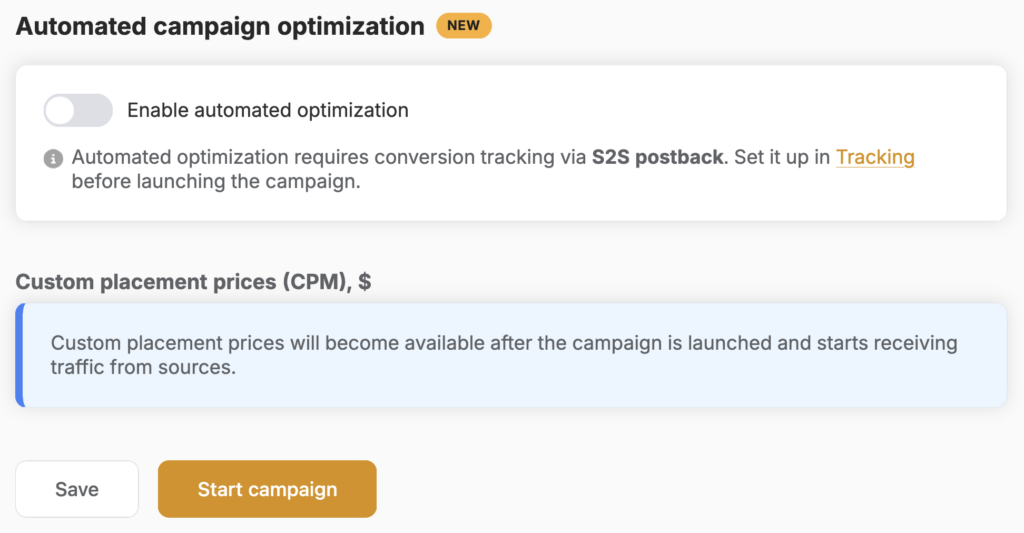
The toggle does nothing without S2S postback tracking already set up. S2S postback means your affiliate network sends a message straight to Remoby’s server every time a conversion happens. Without it, the campaign has no idea which clicks turned into anything, so there’s nothing for the optimization to work from. The settings page warns you about this before you flip the switch, and it’s worth taking seriously.
Here’s the part that catches people out. Right now, while you cut placements by hand, tracking that half works is mostly an annoyance. The numbers look strange, you notice, you go and check.
Once optimization runs on those same conversions, half-working tracking becomes expensive. Conversions that never fire make good placements look dead, and the system cuts them. You end up losing your best traffic because of a tracking bug, and nothing in the report will look obviously broken.
So get this right before you turn anything on:
- New to postbacks? Start with how to set up a postback URL for Pop campaigns.
- Launching a fresh campaign? Go through tracking before you touch bids and targeting.
Send yourself one test conversion and confirm it arrives. That single check is worth more than anything else in this article.
How to turn it on
- Open a Pop campaign running on Smart CPM. Other ad formats and bidding models aren’t covered yet.
- Go to Tracking and confirm your S2S postback is set up and firing.
- In campaign settings, find Automated campaign optimization and switch on Enable automated optimization.
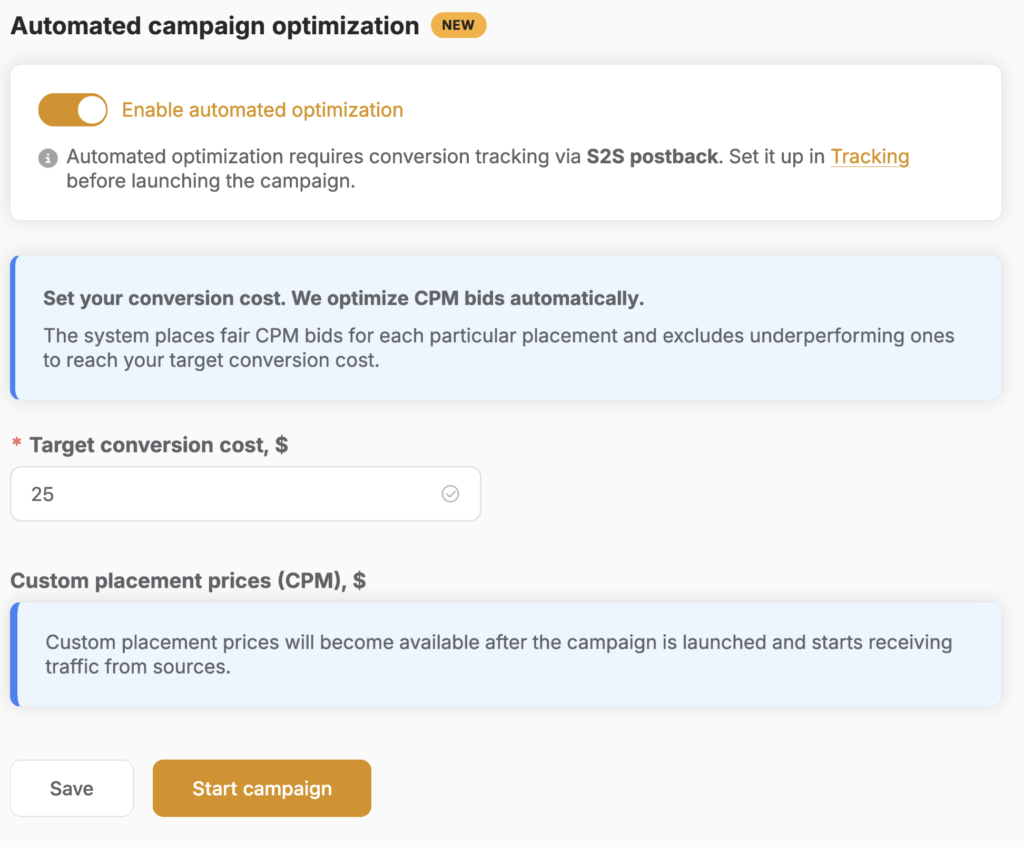
One field to fill in and that’s your setup: the target conversion cost.
One habit worth building early: turn it on by itself. If you also change the bid, the targeting and the creatives on the same day, you won’t know what caused the result you get. Change one thing at a time and you’ll actually learn something from each test.
Give it a narrower pool first
Optimization can only judge what your setup lets it see. Keep one variable per campaign and it gets to a verdict faster.
- One landing page per link. Rotate two and you can’t tell which one earned the conversions, and neither can the system.
- One country and one OS per campaign. Mixed together they hide which combination actually works.
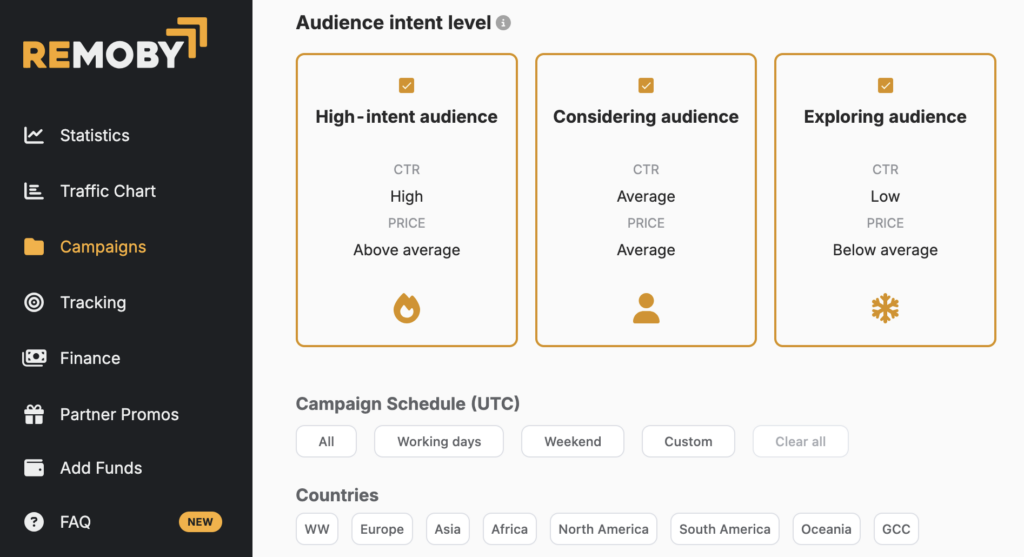
- Audience intent level: High-intent, or High-intent plus Considering. High-intent clicks better and costs more, Exploring is cheap and cold, and with all three on your early spend goes into the cold end while the system is still collecting conversions.
- A whitelist from the same offer type and country, if you’ve got one. Then it trims a list you already trust.
Setting the target too low backfires
Type in the cost you wish you were paying and the campaign still doesn’t hit it. It just takes longer to tell you why.
Exclusion isn’t instant, a placement has to spend enough for the campaign to judge it, and until then it keeps buying at your bid. Roughly what that costs, by target:
- target under $0.5: $10-20 per placement
- target around $2: $20-50
- target above $5: $50-100
The lower your target, the less room a placement has before it’s over it. So keep your bid modest down there. Bid high on a $0.5 target and a bad placement burns through that money in hours, well before the system reaches a verdict on it, and every overshoot like that lands in your average.
Set the target at what conversions actually cost you in your last stable week, then lower it in steps once it holds.
How to tell if it’s working
The first instinct is to watch your cost per conversion. Watch it, but know that it jumps around for many reasons that have nothing to do with this setting, especially early on.
A clearer signal is where your budget goes. If the feature is doing its job, spend should concentrate: fewer placements taking a bigger share, with the small unproductive ones fading out.
You can check that yourself without any special tools. Count how many placements spent anything at all over a week before you turned the toggle on, then count again a week after. If that number dropped while your traffic volume held steady, the campaign is buying from a tighter, better set of placements than it was.
Treat the first run as discovery
Before you commit to hand-set prices, let the toggle tell you which placements are worth them.
- Run it a week on a normal budget, one offer, one country.
- Open the placement report and pull the placement, country and OS combinations that converted.
- Either leave it running so it keeps pruning, or launch a second campaign on those placements with a whitelist and your own prices.
- Repeat per offer and country. The list won’t transfer between them.
One honest caveat
Keep the expectations in the right place. Picking offers, testing creatives, deciding which countries deserve budget at all: that’s still your job. The toggle takes over the repetitive part, which is deciding where to stop buying.
Ready to launch with Remoby?